Before you continue with the steps listed in this guide; you acknowledge and accept that any damage to your phone caused by your attempts to root or unroot your phone is your own responsibility. Appuals, the (author) and our affiliates will not be responsible for a bricked device, dead SD Card, or anything to do with your phone. If you don’t know what you’re doing; please research and If you do not feel comfortable with the steps, then DO NOT PROCEED.
Method 1: Devices That Do Not Have the Custom Recovery Installed
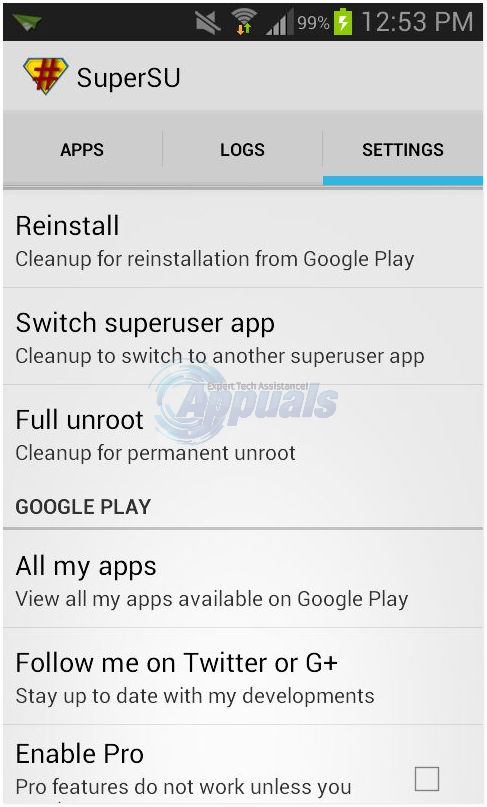
This method will work on all devices provided that you did not install a custom recovery. First, if you do not have the SuperSU application, download it from the Google play store, once installed launch the SuperSU application and head to the settings department and click on Full unroot.
It will pop up a confirmation message, press yes and the SuperSU unroot will close automatically once done, reboot your device and uninstall SuperSU and your phone will be fully unrooted.
Method 2: Using ES File Explorer
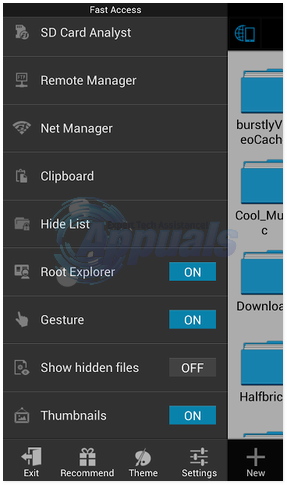
If the first method did not work for you then you can use this one, First; if you do not have Es File Explorer and Super SU, download them from the Google play store, once downloaded open Es File Explorer and tap on menu, you will find a root explorer option that you need to enable.
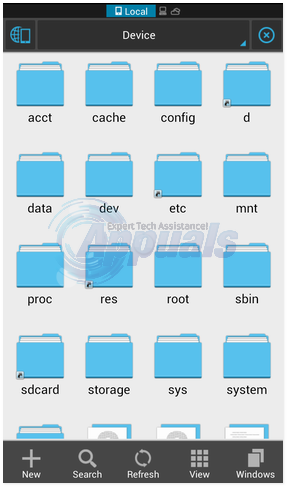
Once enabled SuperSu will ask you to grant root access to this application, allow it. Now go back to your main screen and in the top corner choose on Device you will find an option named ‘/’ click on that. Search for System -> bin
Find the busybox and SU files and delete them, if you cannot find these options skip this step, now press return and enter the “xbin” folder, find the busybox and SU files and delete them too. Now once again return and enter the “app” folder and delete the superuser.apk and restart your device, your phone will be unrooted.
Method 3: Flashing Firmware (Samsung Only)
This method is for Samsung device owners looking to flash old firmware, therefore unrooting your device and restoring it to it’s original settings.
Prerequisites before continuing:
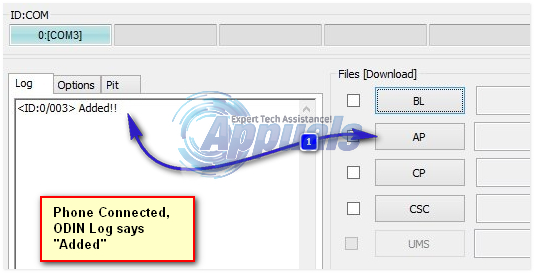
Any Samsung device. A laptop with a USB port. Before you begin; check your model # (variant) by going to Settings -> About phone -> Model number and take a note of it. Now go to this website and search for your model number’s firmware and download it, when downloaded, unzip the file using Winrar or any other program, you should see a .tar.md5 file. If you do not see this file please try extracting it again. Download and install ODIN from here, ODIN is a computer software that allows you to flash firmware, recoveries and root your phone among other usages. When downloaded unzip ODIN. Now turn off your device and boot it into download mode, this can be done with many ways, first try VOL DOWN + Power button + Home button, if that does not work try VOL DOWN + Power button or VOL UP + Power button, when you enter it you will be greeted with a warning screen asking you to press volume up if you want to continue and volume down if you want to reboot, click on your vol up button. Launch odin from the .exe file you just extracted and connect your phone to laptop using a USB cable, you should see a highlighted blue box(Indicating that odin has read your device), if you do not see that please download and install the Samsung USB drivers from here.
Once you see the box press on the “AP” button and search for the firmware (.tar.md5 extension) you downloaded earlier and make sure only Auto reboot is enabled with others unchecked. Press on start and you should be flashing your firmware, once done reboot your phone and start the setup process.
How to Unroot a Rooted Android PhoneFix: Error Connecting to Divinity Original Sin 2 Connection Attempt FailedHow to Fix DirectX Error in Divinity Original Sin 2?Last of Us Part 1 Launch Trailer Shows off New Gameplay, Redone Iconic Moments…