Precautions: Some Things To Keep In Mind
Manufacturer settings for computer devices operate your fans in the safe range, ensuring that your CPU does not overheat. As your system’s temperature rises, your fans kick in to cool it down. Reducing the speed of these fans below the safe or recommended amount may cause your system to overheat. Increasing the fan speeds, on the other hand, may be beneficial in nominal increases. However, maxing out the fans can cause them to get overworked and damaged as well. Upsetting the fan management cycle altogether in either direction may cause them not to start up at all if the implementation is faulty and your system may get damaged from lack of cooling through just basic use. When making any fan adjustments, consider the implications of changing the speeds in either direction and test smaller changes before attempting larger ones.
Let’s Get Controlling!
Step 1: Setting Up Your System
To get started, you will first need to install the Macs Fan Control application onto your system. You can download it for MacOS from this link. Once the download completes, locate the file on your system and move it to the applications folder. Launch the installer from here. The installation will request access for permissions which you will need to accept. Follow the on screen instructions in the installer until the installation is complete.
Step 2: Performing Adjustments
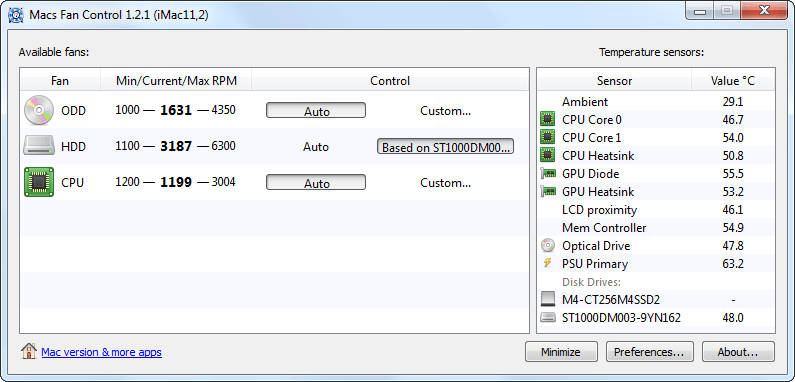
Launch the application on your system. You will notice a list of all the fans in your computer displayed in the window. Beside each fan, you will be able to change the control setting to “Custom.” By default, it’s set to “Auto.” By toggling this setting, you will be able to adjust the fan speeds (through their RPM) as well as sensory variables such as set temperatures at which you would like the fans to prompt their on and off triggers. From the get go, you will also be able to view your system’s temperatures through the application at different sensory points in your build. To adjust a fan’s speed or set temperature value, carry out the following: Note: You should study the standard settings on your MacBook in terms of minimum / maximum fan triggering temperatures as well as the base average RPM and aim to stay close to these values. Offsetting values drastically can be dangerous and may cause your system to shut down or damage itself if it overheats.
Step 3: Minimizing The Application
This application will need to run continuously as it will be operating your fans the entire time your computer is switched on. It can either run in the foreground or be pushed to the background so that it does not visibly get in your way. To push it to the background, click on the Preferences button at the bottom of the main screen and set it to operating in the background. Apply these settings. You will now be able to escape out of the window and let the application minimize into a menu in the menu bar at the top right area of your screen. The application menu in the menu bar can be customized to display the temperature and RPM live as well. Simply click on it in the menu bar and select which fan you would like to have displayed. Ensure that this application starts up with startup as well.
Final Thoughts
Those that understand their computer usage and need the fans to operate a particular way on their Mac device can use the Macs Fan Control application to adjust the fan speeds or sensory input based fan trigger temperatures for each individual fan located inside their Mac build. The application runs in the background to operate your fans at the settings you have configured. For safety reasons, it is advised to stay within the ballpark of the standard values used by the manufacturer to avoid any heat damage or system error.
How To Control The Fan Speeds Of Your Newly Built Gaming PCFIX: Cannot Adjust Volume on a Mac OS X with External DevicesApple’s iPhone 15 Series Could Finally Feature USB-C Along With Faster Data…How to Manually and Automatically Update Your Synology NAS Packages?

