While Linux offers built-in support for NTFS volumes through the ntfs-3 driver, you more than likely don’t have support for exFAT as a file system. To remedy this, open up a terminal by pushing Ctrl+Alt+T. You might also want to search for the word terminal from the Ubuntu Dash. Those with the LXDE, Xfce4, KDE or GNOME desktop environments might want to click on the Applications menu, point to System Tools and then click or tap on Terminal to start.
Method 1: Install Support for exFAT Volumes
Once you’re there, you’ll want to type sudo apt-get install exfat-fuse exfat-utils and push enter. You’ll probably be prompted for your password. You’ll be then asked to install it, so type the letter y. If you were given a warning about it being already installed, then you have the packages and don’t need to do anything else. Assuming the installation proceeded, you’ll be back at the prompt. You can now plug an exFAT drive into your system and expect it to mount like it was any other volume. You can work with it easily as a result and won’t need to do anything else if your only goal was to read a drive created on Windows 10 or something similar.
Method 2: Formatting a Drive to exFAT
If you don’t know the name of the drive that you need to format, then type sudo fdisk -l at the command line and push enter. You’ll see a full list of devices that are attached to your system. Pay very close attention to make sure that you don’t format the wrong drive. If you have a /dev/sda1 and so on device in your list, then this is very often what you boot GNU/Linux off of. You don’t want to format this. We plugged a pretty good sized USB drive into our system and found it showing up as /dev/sdb, which you could easily format. Needless to say, proceeding is going to wipe the data structures off your drive so please make sure to have backups before you loose anything you want. Assuming you wanted to destroy everything on it and start fresh with a new exFAT file system, type sudo wipefs -a /dev/sdb so you can start fresh. Next, you’ll want to type sudo fdisk /dev/sdb and push enter so you can make a new partition table. Please make sure you’re working with the right device file to avoid mucking anything up.
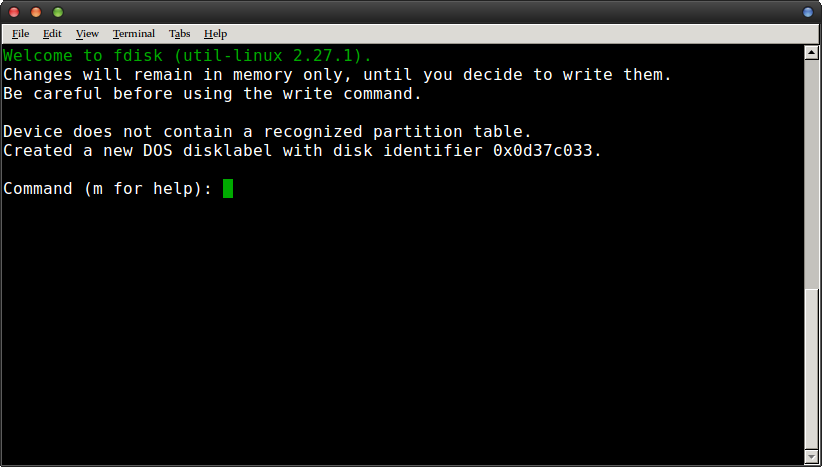
You’ll get a message about creating a new DOS table or something of the sort, which is simply safe to ignore.
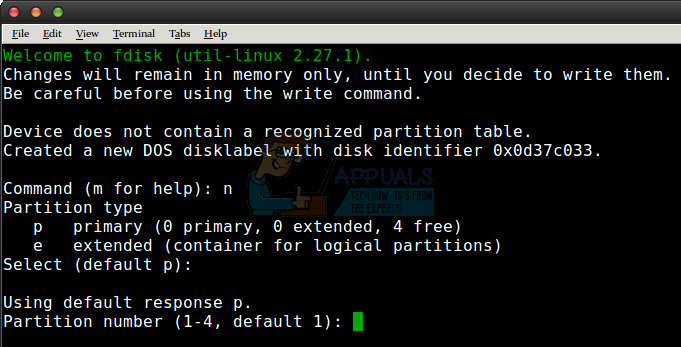
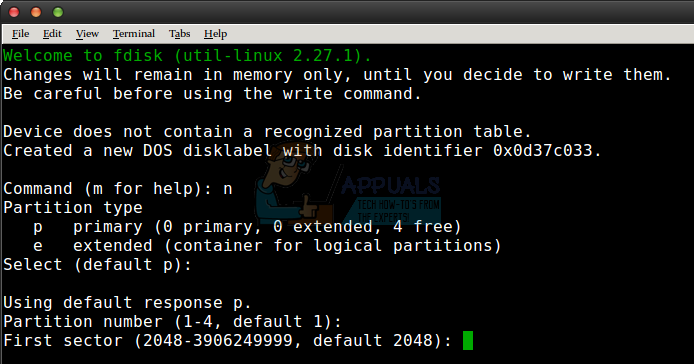
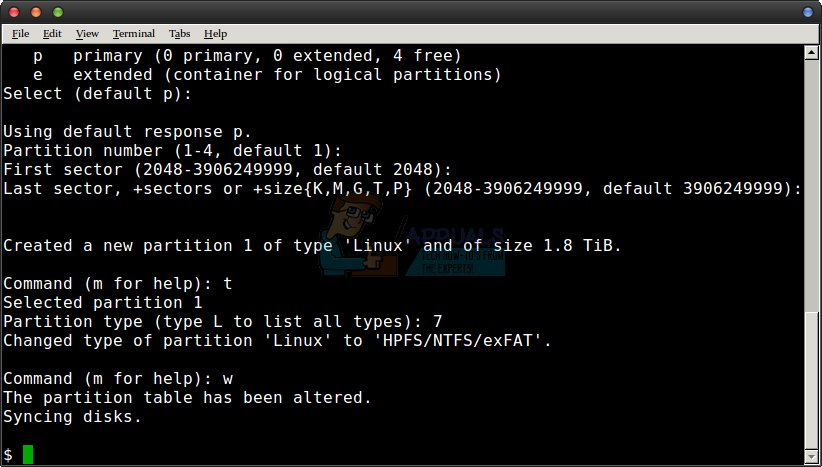
Now type the letter n and push enter. Type enter again, then again to create a single partition.
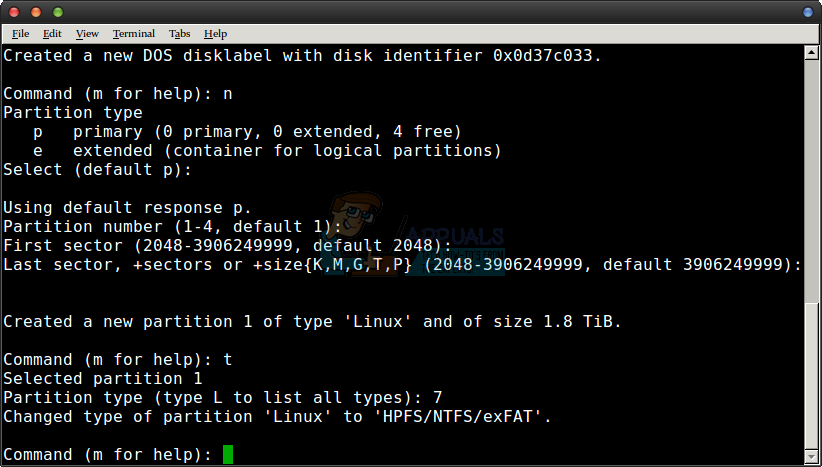
Type enter once more when asked about the first and last sectors. This will create one giant partition that takes over your whole disk, which is exactly what you want if you’re going to be plugging this into a macOS computer, a Windows 10 PC or any compatible mobile device. You might notice a problem though – the partition type is currently showing up as Linux, which you’re going to have a tough time reading on any of these kinds of machines!
Push the letter t and then push the enter key so you can change the type. You can then push 7 to the expected type. It should give you a message about HPFS/NTFS/exFAT, which is exactly what you want if you’re looking to format your external disk with exFAT on Linux.
Finally, you simply have to push the w key and you’ll be warned that “The partition table has been altered” before fdisk syncs all the data out to disk. Depending on how massive your drive is, this might take a few seconds. We were working with a disk that was 2 metric terabytes, which comes to 1.8 terabytes in binary. It still took the software less than maybe 10 seconds to shoot the relevant information out.
Regardless, you’re now ready for the format. That process shouldn’t have taken very long at all, and the good news about it is that you won’t have to do it again. This is a one time deal for the overwhelming majority of users who are going to simply be using exFAT on Linux to move or backup files between different devices. Assuming that the device file from before was /dev/sdb, you can now format your drive with sudo mkfs.exfat -n hardDisk /dev/sdb1 but keep in mind that you can replace hardDisk with any volume label you’d like. You should really double-check with a disk utility or something before committing yourself to the name of the /dev/ file you’re going to be formatting, because once you do it there’s no going back.
Method 3: Checking exFAT Volumes in Linux
While you can’t actually correct errors without access to Microsoft Windows or macOS, Linux does allow you to check exFAT volumes to make sure that there’s nothing wrong with them. Assuming your exFAT drive is the same as above, make sure it’s unmounted and then type sudo fsck.exfat /dev/sdb1 to have it scanned for errors. It will tell give you some information about sizes that you can usually safely ignore. Besides this, however, it should give you a message at the bottom. If it reads “File system checking finished. No errors found.”, then there isn’t anything more to do. If you have errors, then take your drive back over to Windows and run a scan on it.
Difference: FAT32 vs NTFS vs ExFATWhat is the Difference Between Quick Format and Full Format in Windows?How to Convert Man Pages to PS or PDF Format from the Linux Command LineHow to Format Flash Drive on a Mac
