In this Appuals exclusive guide, we’re going to show you exactly how to create your own font, and it will be in .OTF format which can be installed on Android, iOS, or your computer. Before we begin, there are two ways you can do this:
Drawing the font by hand, and importing it to your computer.Drawing the font completely digitally.
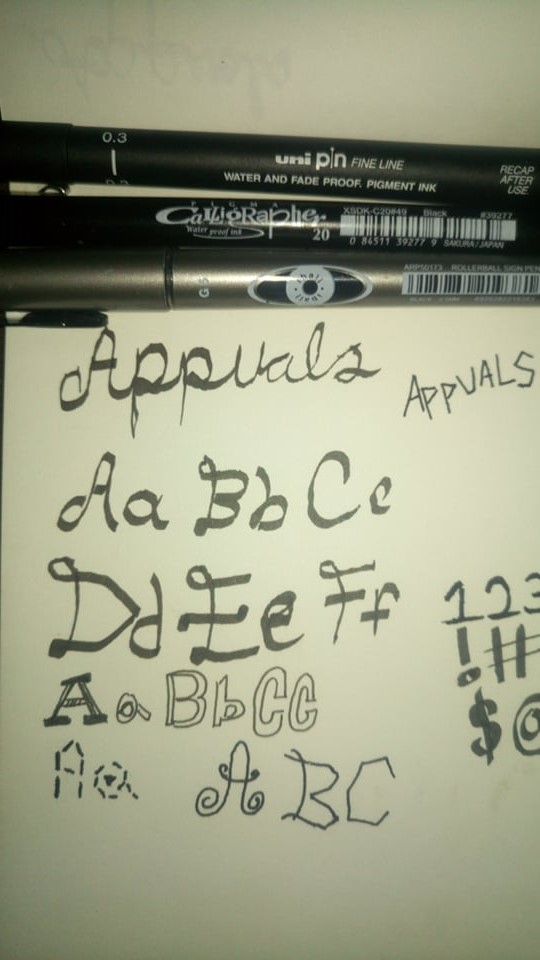
Neither method is better than the other, its simply what you prefer – drawing the font by hand is a great idea if you’re artistically-inclined. You should have a great set of pens, such as fine-tip or calligraphy pens, in black ink. Some great brands are:
Uni Pin Drawing PensPilot Precise V5 Roller Ball Stick PenSakura Pigma Calligrapher
If you opt for the digital-only route, you either need a very steady mouse hand, or a stylus / drawing tablet. Some great drawing tablets include:
Huion H610 Pro Graphic Drawing TabletWacom Intuos Drawing TabletParblo A610 10” x 6” Graphic Drawing Pen Tablet
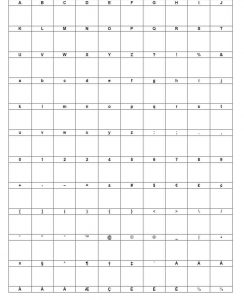
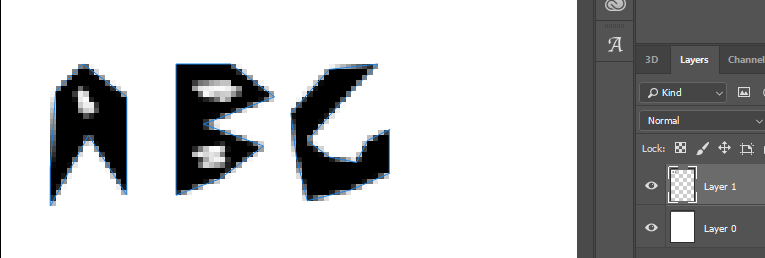
Whichever route you choose is up to you. In any case, we’ll be using Adobe Illustrator for this guide, though creating font is certainly possible in other programs such as Photoshop or GIMP. However, Illustrator is highly recommend for creating vector-based fonts, because vector graphics can easily scale up or down without loss in pixel quality. If you’ll draw your font by hand, you should use a font template sheet, and draw each letter inside the individual boxes. The one we’ve provided below should work perfectly fine if you just print it out, then scan it back into your computer when you’re done – if you don’t own a scanner, taking a high-res photo might work if you can get a really good angle and lighting, if you don’t mind doing a bit of digital touch-up. If you’re doing your font purely digitally, then you need to draw each character, symbol, and letter on a single Image layer, as pictured below. Ignore the horrible drawing quality, it is a 5-second example. Your glyphs should be about 500 pixels in both width and height – but no larger than 1000 pixels, and no smaller than 300. This will allow your font to be properly displayed on Retina devices. Its also a good idea to enable the grid / ruler in Illustrator, so all your letters are evenly aligned ( ⌘+R for Mac, CTRL + R for Windows). All of your letters should be on a single row, so they can all easily be imported at once. Your alphabet should be properly aligned from A to Z, and numbers as well from 0 to 9, going left to right (»ABCDEFG). After you’ve drawn your entire font, you need a dedicated font-creation software. Font-creation software will take your illustrated font, and convert it into an actual font that can be installed on mobile devices or PC. Some good options are:
FontForge (Free, open-source)FontSelf (Adobe Illustrator + Photoshop plug-in, $49)
There’s really a ton of options out there, ranging from super-expensive to free but extremely limited. If “free” is your budget, a good article to check out is Mashable’s “7 Free Tools for Creating Your Own Fonts”. Though some of the tools on that list are browser-based and cannot import graphics, which renders most of this guide useless. So moving forward we’ll be using FontSelf as our reference example, because it plugs directly into Photoshop / Illustrator. If you choose another font-creation software, you’ll need to refer to their documentation on importing vector graphics into their software for font creation. In any case, since we’re using FontSelf, we will simply: Select the layer containing our drawn alphabet in Illustrator.
For a single character, type or paste the related character in the Fontself text field and press “Create Glyph”.For a whole alphabet, press the “a-z” button if it’s a set of lowercase letters or press “A-Z” for uppercase.For any other set of characters, press Batch.
Drag & drop on the Fontself panel also works as an alternate way to create glyphs. Just drop your selection on top of the relevant area. Adjust the baseline & margins around each glyph in the Fontself panel (just click & drag), and you can also change the keyboard key by typing a new character below each glyph. Press Export to save your font as an OpenType .otf file and click on the Open Exported Font link in the green alert to install the font on your operating system. You can also send the .OTF file to your mobile device (Android or iOS) and install it through whatever method you would install new fonts on your device.
How to Install Fonts with SkyFonts on WindowsHow to Add Fonts to PhotoshopHow to Block Untrusted Fonts on Windows 10?How to Fix Corrupted Fonts on Windows 10 and 8