Users are already reluctant enough about starting an update of anything, especially their operating system because that updating process usually slows the computer down, even if it’s only working in the background. However, receiving these errors codes puts people off even more and Microsoft definitely needs to do something in order to prevent these error messages from occurring so often.
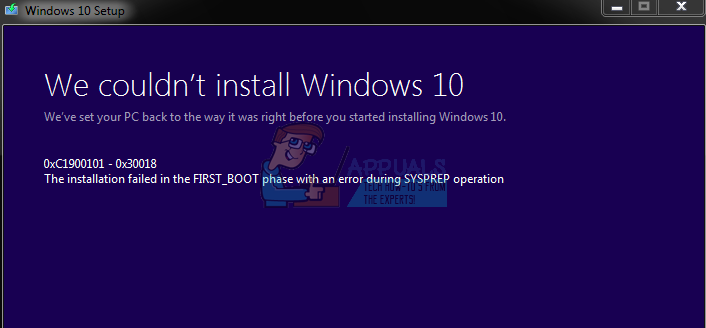
0xC1900101 – 0x30018 Error
Upgrading from Windows 8.1 to Windows has always been a painful process, especially when you end up receiving this error message constantly at random intervals during the updating process. The error message manifests itself through a Blue Screen of Death and the real solution to this problem is yet to be announced by Microsoft.
The problem usually appears when you are trying to install Windows 10 to a computer running Windows 7, 8, or 8.1; but it can also appear when you try to install a regular update manually. Let’s find out just how to fix this issue!
Solution 1: Make Sure Your Computer Is Ready For the Update
There are quite a several steps you need to undertake before even running the update yourself. These steps are numerous but it shouldn’t take a long time before you are able to install the update yourself. Make sure you do everything on the list below and try to run the update after accomplishing this.
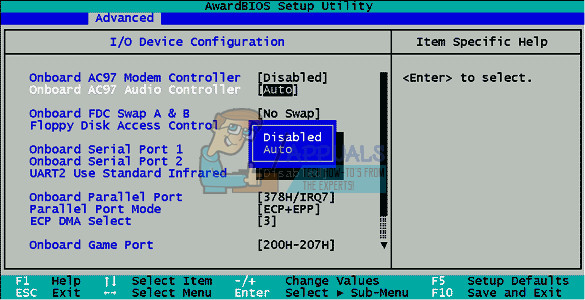
Solution 2: Disable the Onboard Sound in BIOS Settings
Several users have reported that disabling the onboard sound in BIOS managed to fix their issue and they were able to perform the update without issues. This is not a difficult operation and it can easily fix your problem. However, make sure you have performed all the necessary steps from the Solution 1 before moving forward to other solutions.
Solution 3: Install Windows Using Media Creation Tool
This particular error message is shown if you are updating Windows using the in-built Update Manager and it appears at random percentages during the update process. However, you can Assistant and alternative which goes by the name of Media Creation Tool which let’s you install Windows using the .ISO file you can download at Microsoft’s official page. You can also use Rufus to perform the update for you by following the instructions from our article on the topic.
Solution 4: Try the DISM Tool
Deployment Image Servicing and Management (DISM.exe) tool is a useful tool which can scan your Windows image for errors and mistakes you might have caused in it. It can be run easily by using Command Prompt and it can be used also to fix the errors automatically. After running it, make sure you wait for at least half an hour for it to finish since the tool checks everything regarding your Windows image. Find out more info on how to fix it by visiting this article we made on how to run DISM.exe.
Solution 5: Try This Simply Registry Hotfix
This particular fix was able to help countless people fix their Windows Update-related issue and it’s worth checking this out before running your Windows Update again. Additionally, this particle solution was directly linked to solving this error messages by several users so please check this out. It basically gets rid of unused drivers on your computer which is a job your Disk Cleanup tool should take care off but for some reason it doesn’t. rundll32.exe pnpclean.dll,RunDLL_PnpClean /DRIVERS /MAXCLEAN
Solution 6: Reset your Windows Update Components
This is quite a lengthy procedure but it helps users deal with their errors during their updates and it has proven to solve various error codes, including the one we are dealing with right now. However, make sure you have tried all of the solutions and steps above before trying this one as the ones above are much quicker. net stop msiserver net stop wuauserv net stop bits net stop cryptSvc ren C:\Windows\SoftwareDistribution SoftwareDistribution.old ren C:\Windows\System32\catroot2 Catroot2.old net start wuauserv net start cryptSvc net start bits net start msiserver
Solution 7: Using the Built-In Windows Troubleshooters
Windows 10 comes preinstalled with several troubleshooters which can automatically recognize the problem you are having and fix it for you in no time. These troubleshooters have helped a lot of people who are not so experienced in dealing with these issues themselves and the process takes almost no time at all.
Solution 8: Disable Wi-Fi in BIOS
It turns out that disabling Wi-Fi in BIOS helped several users deal with their problem so it’s worth giving this a shot. It’s not time-consuming and it may fix the issue for you as well. This particular solution is mostly for laptop users.
Solution 9: Modify or Create a Registry Key
This particular registry key is known to be a cause for this particular error message so make sure you either create it or modify it in the following manner. However, you should backup your registry just in case you configure it incorrectly since changing the registry may cause unpredictable errors to your PC. Now what we have created a backup for our registry, let’s get to the fix. HKEY_LOCAL_MACHINE\SOFTWARE\Microsoft\Windows\CurrentVersion\WindowsUpdate\ OSUpgrade
FIX: Windows 10 Anniversary Update Error 0x1900101-0x30018 “FIRST_BOOT Phase"Fix: Windows 10 Install Error 0xC1900101 - 0x20004Fix: 0xc1900101 – 0x4000d Error During Windows 10 InstallationHow to Fix ‘Error 0xc1900101’ on Windows 11 Installation Assistant?